

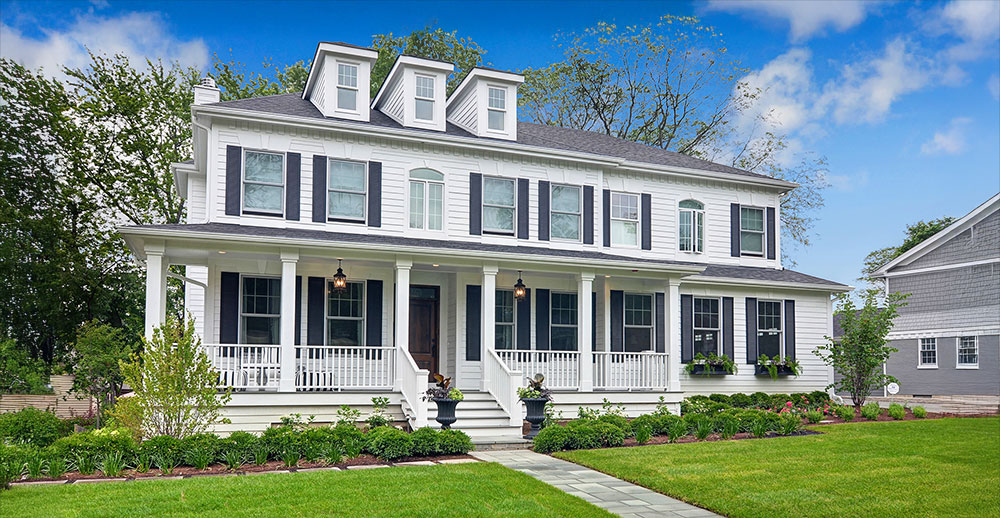
Building a custom home, completing a major renovation, or adding substantial living space involves many interconnected decisions. Having the home design build process explained clearly can help homeowners understand what to expect, how decisions are made, and why working with one coordinated team can make the experience more efficient. The design-build approach combines design, planning, budgeting, permitting, and construction under a unified process. Instead of managing separate architects, designers, engineers, and contractors independently, homeowners work with a team that collaborates from the earliest concepts through final completion.
What Is the Design-Build Approach?
Design-build is a project delivery method in which one company or coordinated team manages both the design and construction portions of a project. This differs from the traditional design-bid-build model, where an architect completes the plans before contractors submit bids. Under the traditional model, the designer and builder may have limited communication until construction is about to begin.
With design-build, the builder participates in the planning process from the start. This allows the design team to evaluate construction methods, material availability, scheduling considerations, and budget implications while the plans are still being developed. The result is a more collaborative process in which design goals and practical construction requirements are considered together. According to the National Association of Home Builders, this integrated delivery method has become increasingly common for complex residential projects.
For luxury custom homes and major renovations, this collaboration can be especially valuable. High-end residential projects often involve complex architecture, specialized materials, custom millwork, sophisticated mechanical systems, and carefully coordinated interior details. Early communication among all parties helps reduce surprises and keeps the project aligned with the homeowner’s priorities.
Step 1: Initial Consultation and Project Discovery
The first step is an introductory meeting with the design-build team. This conversation allows the builder to learn about the homeowner’s vision, lifestyle, property, priorities, and general expectations. It also allows the homeowner to learn about the company’s experience, communication style, process, and approach to craftsmanship.
During the initial consultation, the team may discuss:
- Whether the project is a new custom home, addition, or renovation
- The preferred architectural style
- The homeowner’s functional needs
- Desired square footage
- Important rooms and features
- The condition or location of the property
- General budget expectations
- Preferred timing
- Long-term plans for the home
Homeowners do not need to have every detail determined at this stage. The purpose is to establish the broad scope of the project and determine whether the design-build team is a good fit. For a renovation or addition, the builder may also ask about existing problems in the home, such as limited space, an outdated layout, insufficient storage, or poor connections between indoor and outdoor areas.
Step 2: Property and Existing-Condition Evaluation
After the initial conversation, the design-build team evaluates the property. For a new custom home, this may include reviewing the lot, zoning requirements, setbacks, topography, utilities, drainage, access, and neighborhood guidelines. The team may also consider how the home can be positioned to take advantage of natural light, views, privacy, and outdoor living opportunities.
For additions and major renovations, the evaluation typically includes a close inspection of the existing home. The builder may examine the foundation, framing, roofing, plumbing, electrical systems, heating and cooling equipment, and structural conditions. Measurements and photographs may also be taken to document the current layout.
This step helps identify constraints that could influence the design. For example, an addition may require structural reinforcement, utility relocation, or updates to older systems. Identifying these conditions early allows the design team to create a more realistic plan and budget.
Step 3: Establishing the Project Program
The project program is a detailed list of the spaces, features, and performance goals that the design must address. It converts the homeowner’s ideas into a more organized set of requirements.
For a new luxury home, the program may include:
- Number and size of bedrooms
- Primary suite features
- Kitchen layout and appliance needs
- Home office requirements
- Formal and informal entertaining spaces
- Mudroom and laundry areas
- Fitness or wellness rooms
- Wine storage
- Finished basement spaces
- Garage size and configuration
- Outdoor kitchens, patios, or screened rooms
- Smart-home technology
- Energy-efficiency goals
- Accessibility or aging-in-place considerations
For a renovation, the program may focus on improving flow, enlarging specific rooms, creating additional storage, updating finishes, or adapting the home to changing family needs. A thorough project program gives the design team a clear foundation for developing the plans.
Step 4: Preliminary Budget Planning
Budget planning begins early in the design-build process. Rather than waiting until the plans are complete, the builder provides cost guidance as the design evolves. This allows the homeowner to understand how decisions related to square footage, architectural complexity, materials, systems, and site conditions may affect the overall investment.
At this stage, the budget is often presented as a preliminary range rather than a final contract amount. The range may include allowances or assumptions for major categories such as cabinetry, appliances, flooring, plumbing fixtures, lighting, landscaping, and specialty features.
Early budget discussions help the team prioritize the elements that matter most. If a homeowner values a highly detailed kitchen, custom millwork, expansive windows, and premium outdoor living spaces, the design and budget can be developed around those priorities. Value engineering can also occur before construction begins, when adjustments are easier and less disruptive.
Step 5: Conceptual Design
Once the project goals and preliminary budget are established, the design team begins creating initial concepts. These may include floor plans, exterior elevations, site layouts, sketches, and three-dimensional renderings.
Conceptual design focuses on major decisions such as:
- Room placement
- Traffic flow
- Overall size
- Relationship between indoor and outdoor spaces
- Architectural character
- Window placement
- Ceiling heights
- Rooflines
- Garage location
- Major exterior materials
Homeowners review the concepts and provide feedback. The design may go through several revisions as ideas are refined. This collaborative stage is important because it establishes the overall direction of the project before detailed construction documents are prepared.
Step 6: Design Development
During design development, the approved concept becomes more detailed. The team begins specifying materials, dimensions, structural requirements, building systems, and interior features. Engineers and specialty consultants may become involved depending on the complexity of the project.
Design development may address:
- Foundation and framing systems
- Plumbing and electrical layouts
- Heating, cooling, and ventilation
- Window and door selections
- Roofing materials
- Exterior cladding
- Cabinetry plans
- Stair and railing designs
- Fireplace details
- Ceiling treatments
- Built-in storage
- Interior trim and millwork
- Lighting plans
- Flooring and tile layouts
The builder continues reviewing the design for constructability and cost. This ongoing input helps ensure that the design can be built efficiently without compromising the homeowner’s vision.
Step 7: Interior Selections and Finish Coordination
Material and finish selections are a significant part of any luxury home project. Depending on the company, homeowners may work with an in-house designer or a trusted interior design professional. The selection process is typically organized into categories and scheduled to prevent delays.
Choices may include:
- Cabinet styles and finishes
- Countertop materials
- Plumbing fixtures
- Decorative lighting
- Flooring
- Tile
- Paint colors
- Hardware
- Interior doors
- Appliances
- Fireplace surrounds
- Closet systems
- Wall treatments
- Exterior finishes
A coordinated design-build process helps ensure that selections complement the architecture and fit within the established budget. It also allows the team to confirm lead times and place orders for specialized products well before they are needed on the jobsite.
Step 8: Construction Documents and Final Pricing
After the design is approved, the team prepares detailed construction documents. These drawings and specifications provide the information needed for permits, trade contractor pricing, material ordering, and construction.
The documents may include architectural plans, structural drawings, engineering details, electrical plans, plumbing layouts, mechanical information, interior elevations, and product specifications. The builder uses this information to develop a more precise project cost.
At this point, homeowners typically review a detailed proposal or construction agreement. The agreement may outline:
- Scope of work
- Project price or pricing structure
- Allowances
- Payment schedule
- Estimated construction timeline
- Change-order procedures
- Warranty information
- Responsibilities of each party
Careful documentation helps establish clear expectations before work begins.
Step 9: Permitting and Preconstruction Preparation
Before construction starts, the project must receive the required approvals. The design-build team generally coordinates the permit application process with the appropriate municipality. Depending on the location and scope, permits may be required for building, demolition, plumbing, electrical, mechanical, grading, or other work.
Preconstruction planning also includes developing the project schedule, confirming trade contractor availability, ordering long-lead materials, and establishing jobsite logistics. For renovations, the team may create a plan for protecting areas of the home that will remain occupied or untouched.
The preconstruction phase is essential because it prepares the project for an organized start. A detailed plan reduces uncertainty and helps trades, suppliers, and homeowners understand the upcoming sequence of work.
Step 10: Site Preparation and Construction
Construction begins with site preparation. For a new home, this may include clearing, excavation, utility work, grading, and foundation construction. For an addition or renovation, preparation may involve selective demolition, temporary supports, dust containment, and protection of existing finishes.
The construction sequence generally includes:
- Foundation work
- Structural framing
- Roofing
- Window and exterior door installation
- Plumbing, electrical, and mechanical rough-ins
- Insulation
- Drywall
- Interior trim
- Cabinetry
- Tile and flooring
- Painting
- Plumbing and electrical fixtures
- Exterior finishes
- Landscaping and hardscaping
The exact sequence varies depending on the project. Throughout construction, the project manager coordinates trades, monitors quality, tracks the schedule, and communicates with the homeowner.
Step 11: Ongoing Communication and Quality Control
Clear communication is one of the most important elements of a successful design-build project. Homeowners need regular updates regarding progress, upcoming decisions, schedule changes, and budget considerations.
A professional design-build team may provide updates through meetings, phone calls, emails, project management software, or written progress reports. Homeowners may also participate in scheduled walkthroughs at major construction milestones.
Quality control occurs throughout the project rather than only at the end. The builder reviews workmanship, verifies that materials match the specifications, and ensures that work complies with the plans and applicable codes. Any issues can then be addressed before later phases make corrections more difficult.
Step 12: Managing Changes During Construction
Even with careful planning, homeowners may decide to change certain features after construction begins. Unexpected site or structural conditions can also require modifications, particularly during renovations.
A formal change-order process documents:
- The requested change
- The reason for the change
- The cost impact
- The schedule impact
- Required approvals
Written change orders help prevent confusion and ensure that everyone understands how a decision affects the project. Homeowners can minimize unnecessary changes by making selections early and reviewing the plans carefully before construction starts.
Step 13: Final Walkthrough and Punch List
As construction nears completion, the builder performs detailed inspections and prepares the home for turnover. The homeowner participates in a final walkthrough to review the completed work.
During the walkthrough, the team creates a punch list of minor items that need correction or adjustment. These may include paint touch-ups, hardware adjustments, finish repairs, or final cleaning details. The builder coordinates the completion of these items before or shortly after occupancy, depending on the agreement.
Final inspections may also be required by the municipality before a certificate of occupancy is issued. The project cannot be considered fully complete until all required approvals have been received.
Step 14: Homeowner Orientation and Project Completion
The final stage includes introducing the homeowner to the home’s systems and features. The builder may explain how to operate heating and cooling equipment, smart-home controls, appliances, lighting systems, fireplaces, security features, and other specialized components.
Homeowners may also receive:
- Product manuals
- Warranty documents
- Maintenance recommendations
- Paint and finish information
- Subcontractor contacts
- Final plans or specifications
- Instructions for seasonal maintenance
A reputable builder remains available after completion to address warranty questions and help homeowners understand how to care for the property. This ongoing relationship can be especially valuable in a custom home with specialized systems and materials.
Benefits of the Home Design-Build Process
The design-build approach offers several advantages for homeowners undertaking complex residential projects. Bringing design and construction professionals together early creates a more integrated experience.
Potential benefits include:
- One primary point of responsibility
- Earlier and more accurate budget input
- Better coordination between design and construction
- Faster decision-making
- Fewer communication gaps
- Improved constructability
- More efficient scheduling
- Greater consistency from concept through completion
- A collaborative approach to problem-solving
The success of the process still depends on choosing an experienced team. Homeowners need a builder with strong design knowledge, reliable trade relationships, transparent communication, and a demonstrated commitment to quality.
Frequently Asked Questions
How long does the home design-build process take?
The timeline depends on the size, complexity, location, permitting requirements, and material selections. A major renovation may take several months, while a fully custom luxury home can require a year or longer from initial planning through completion.
When is the final project price determined?
Preliminary budget guidance begins early, but detailed pricing is typically finalized after the design, specifications, engineering, and major selections are sufficiently developed.
Can design-build be used for renovations and additions?
Yes. The process works well for new homes, luxury additions, whole-home renovations, kitchen expansions, primary suite additions, finished basements, and other substantial residential projects.
Do homeowners still have control over the design?
Yes. Design-build is collaborative. Homeowners provide input throughout the planning, design, material selection, and construction phases.
What happens if unexpected conditions are discovered?
The builder evaluates the condition, explains the available solutions, and documents any effect on cost or scheduling through the project’s change-order process.
Are architects and engineers involved in design-build projects?
They may be. The exact team depends on the project. Custom homes and structural renovations often require architectural, structural, civil, mechanical, or other professional expertise.
How can homeowners prepare for the design-build process?
Homeowners can begin by identifying their priorities, gathering inspiration, considering their long-term needs, establishing a realistic investment range, and choosing a builder with relevant experience.
What is the homeowner’s role during construction?
The homeowner reviews updates, approves selections, responds to questions, attends key meetings, and makes timely decisions. The builder manages daily construction activities and trade coordination.
Build or Transform Your Home With Rite-Way Custom Homes
A successful custom home or major renovation begins with a thoughtful process, experienced leadership, and close attention to every detail. At Rite-Way Custom Homes, we specialize in extraordinary custom homes, luxury additions, and major renovations for discerning homeowners. Whether you are planning to build your dream home from the ground up, expand your current living space, or transform an existing property with high-end renovations, our team can guide your project from the earliest design ideas through final construction.
For more than 30 years, we have built some of the most beautiful custom homes for our clients. Our commitment to quality, integrity, personalized service, expert craftsmanship, and careful project coordination has made us a trusted name in luxury home building. Contact us to begin creating a home that reflects your style, supports your lifestyle, and exceeds your expectations.